Employees and candidates represent individual users of the YSoft Clerbo system, to whom further content is related. Within the framework of onboarding, a user account has to be created for each new incoming employee, in order to be able to allocate a course.
Contents
Profile picture
Each employee must have his own profile picture. The recommended picture dimensions are 200 x 200px.

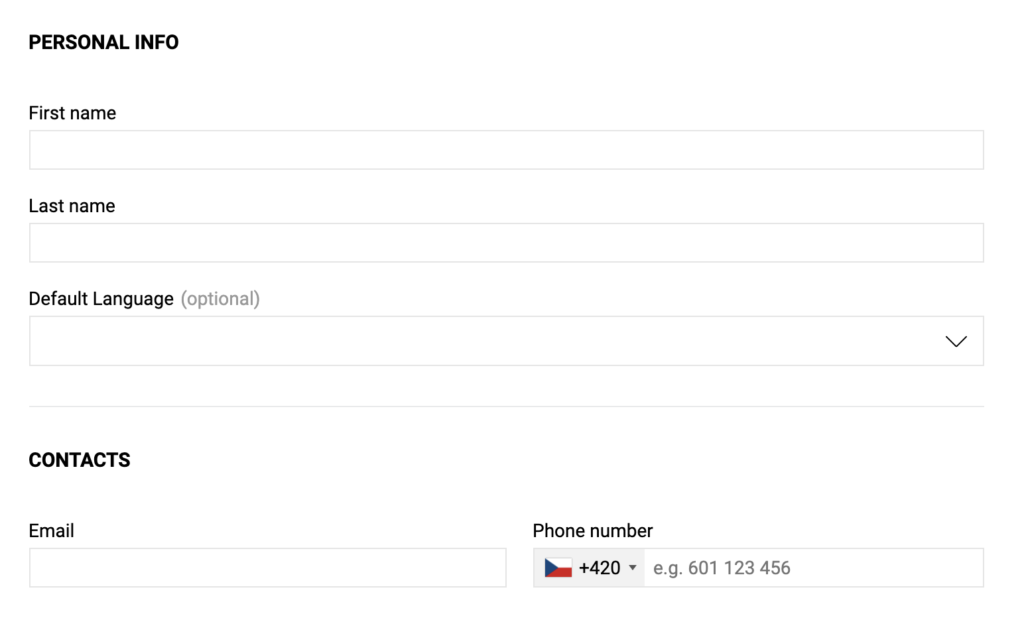
Personal information
This section contains basic user information. Apart from the name, it is possible to set up:
Default language – this determines in which language the system is displayed following the initial sign-in. The user can later change the language.
Email – allows the system to send a welcome email, alert or confirmation of password change by the user.
Phone number – makes it easier for other employees to contact a given user. If sign-in via SMS code has been activated, the user can use this number to sign in.
To create a user, it is necessary to fill in at least one contact detail (email or telephone).
If the fields in this section are grayed out while editing, it means that this user’s data have been administered in another system and Clerbo is merely reading them.
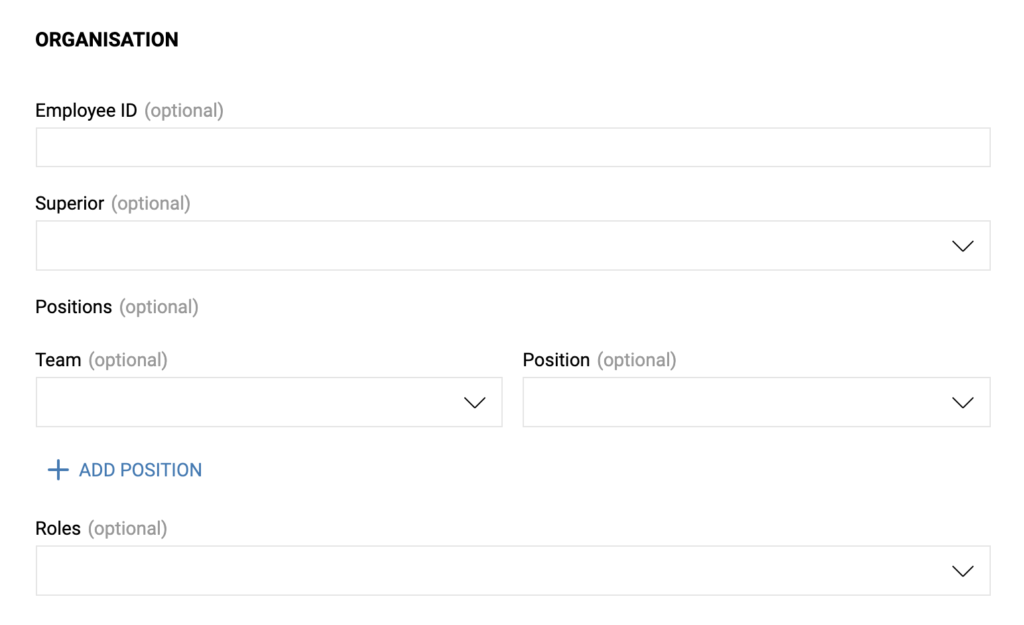
Organization
In this section it is possible to input information related to the organizational structure (supervisor or team role). The role serves to subsequently divide the users into groups.
Sign-in details
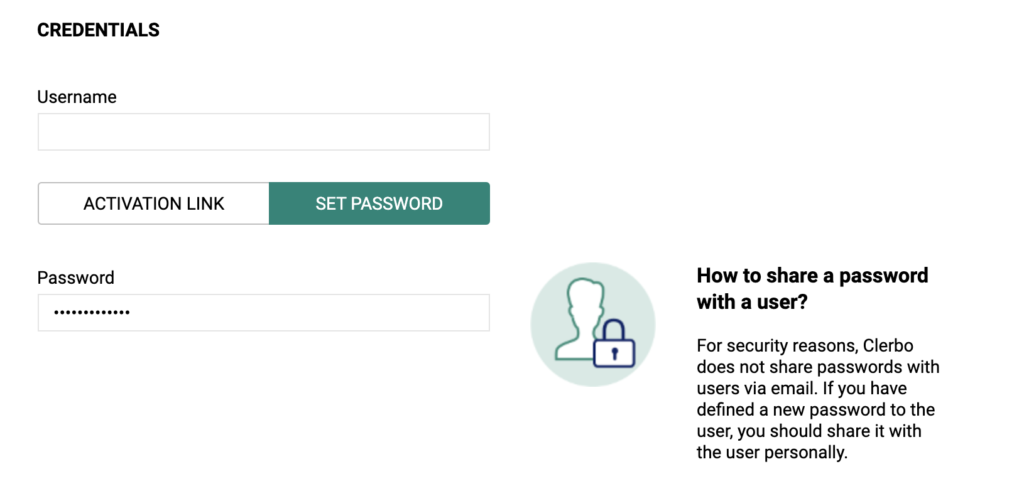
A user must have a unique username to be able to create an account. Use a unified format that users can remember (e.g. namesurname).
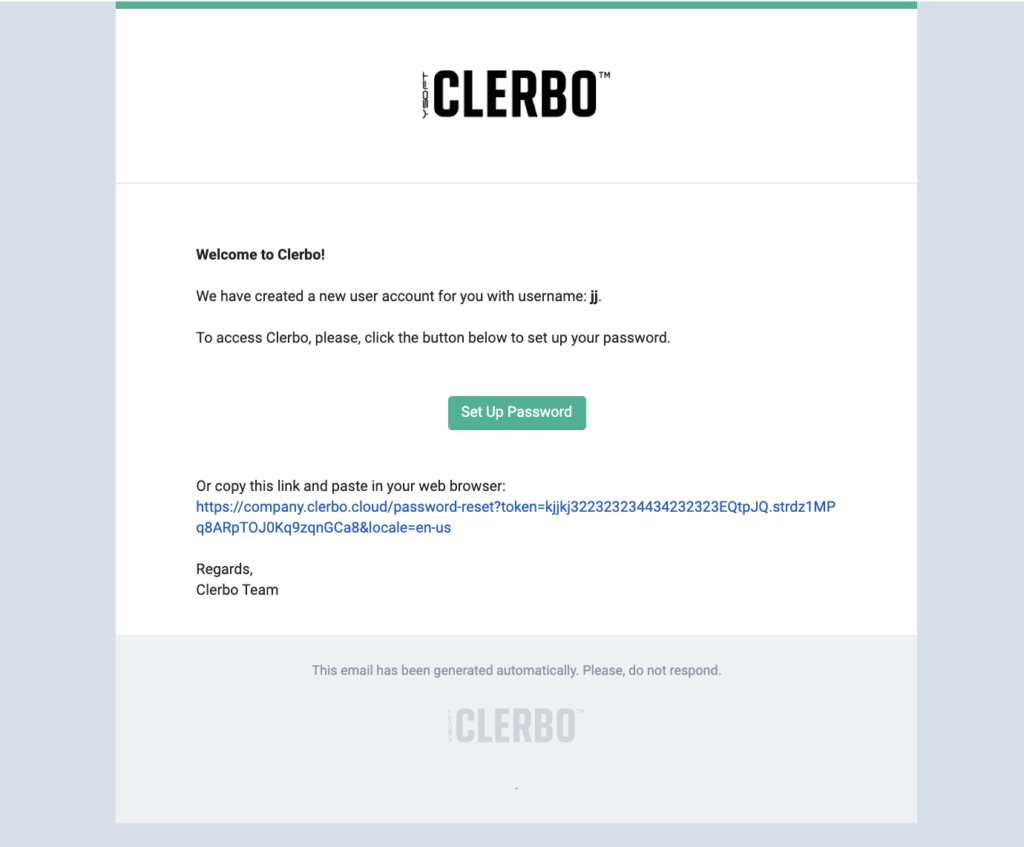
Sign-in link
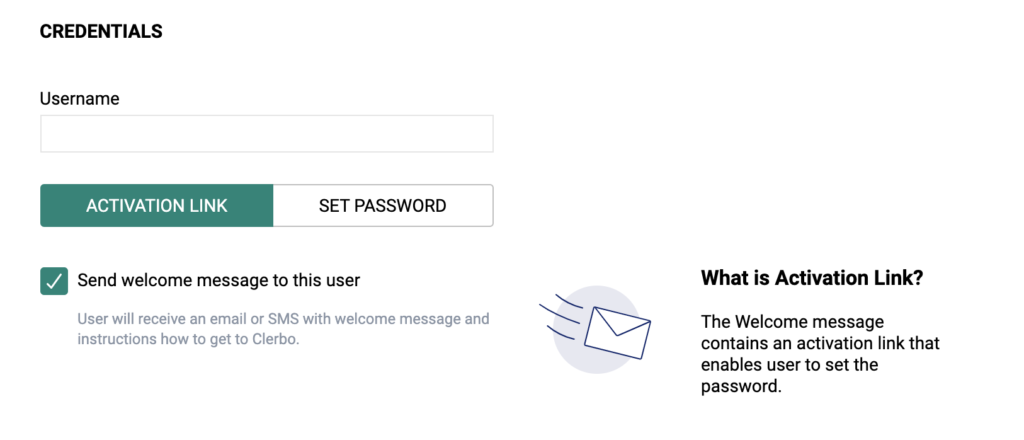
To send an email with the sign-in link, tick the relevant checkbox, as shown on the picture above. Within a few minutes, the user receives an email with a link, where, after clicking, they can set their password. They can subsequently sign in.
Manual password setup
The password can also be set up manually, as shown in the picture below. For security reasons, a password set up by the administrator is not sent automatically by email to the user. in this case, provide the user with their password by another secure method, ideally in person.
To avoid having to create each user separately, it is possible to import them into the system en masse, or use the option to integrate with the system which you commonly use within your company for employee administration. If you are interested in this option, we would be happy to show you how. You can find more on user import in the guide: https://help.clerbo.cloud/courses/415-seznam-zamestnancu/
Rights
The system offers several levels of user rights.
Select, whether it is a:
- Candidate
- A selection process participant. Through the Clerbo environment, they can familiarize themselves with the organization and the progress of the selection process.
- No further rights are available.
- Pending employee
- A future employee who can undergo pre-boarding in Clerbo.
- No further rights are available.
- Employee
- Has access to all parts of the system except administration.
- Further (optional) rights are described below.
- Service user
- Is an external user administering the system. They are not an employee.
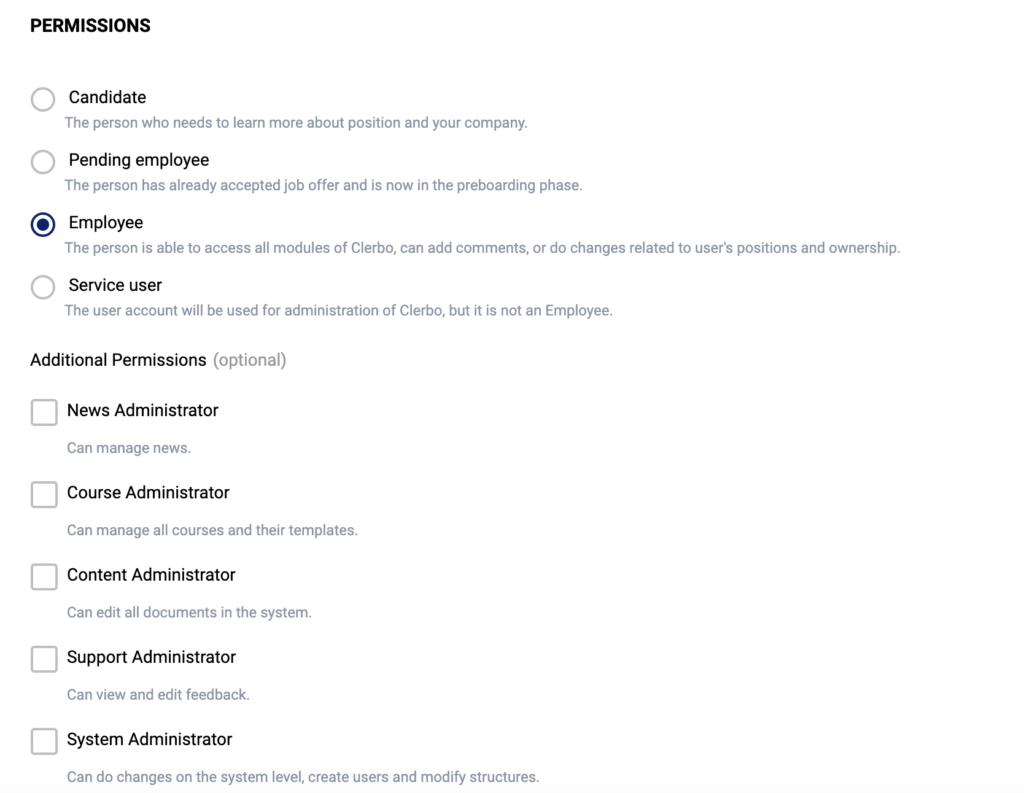
The following are optional rights for the employee:
- HR Administrator – Can create and edit users.
- News administrator – They see and can amend any content within the framework of the news portal.
- Course administrator – They have an overview of all courses, their content and statistics. They can create courses but do not currently have the right to create or amend users.
- Content administrator – They see and can amend any content within the organization (e.g. news, guidelines, etc.).
- System administrator – They have the highest level of rights within the system. As well as any content administration, they can create and amend users and teams.
- Support administrator – They have access to and can amend feedback provided via the
 icon in the bottom right hand corner. They may have to provide this feedback as a requirement of the Y Soft organization.
After filling in the above mentioned information, the creation of a user has to be confirmed by clicking on Create. If the creation of the employee has been successful, the system displays their user profile.
Should you wish to deactivate created users, you can switch them from the user profile to “Archived” status. More at How to work with a user.